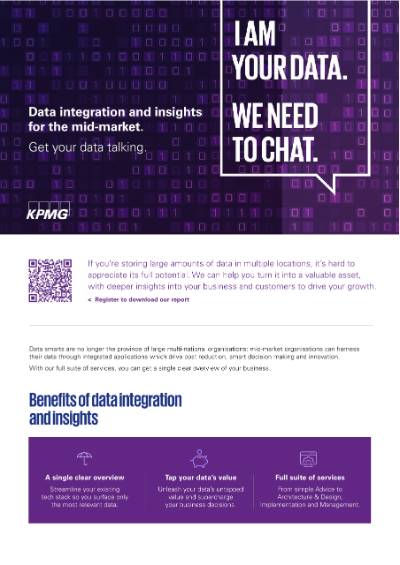
Sunday, May 5, 2013

Industrialized SOA - Where are you? - Part 1

In my job I have had the privilege of working on some high profile SOA projects but more satisfyingly I have been able to see most of them through to success. This process can be rewarding but it also has its downsides and it is not (unfortunately) all Greenfields and jelly beans. In fact a lot of what I do is fire fighting and it is not easy rescuing projects on the verge of failure. You know the ones I am talking about, right? The toxic ones… the ones that no one wants to touch with a 10-foot pole.

My wife and I were fortunate to be eating an amazing Indian cuisine cooked by my colleague Arun’s wife (some of you may know Arun from his popular blog on Oracle BPM or as the author of Oracle SOA Suite 11g Administrator’s Handbook). This catch up over great food and wine turned out to be an excellent opportunity to really talk about our passion for software delivery; perhaps much to the boredom of our respective partners.

One of the things Arun had mentioned was that he had recently been impressed by Mark Nelson’s musing about SOA Development & Delivery. As a long-time subscriber to Mark’s blog, I was keen to check it out. So after a sound night’s sleep, I was quick to Google ‘RedStack’ and here it was….
Short
Sweet
To-the-point
….And it hit home!
While Mark did not say this directly, it seems clear to me that the SOA brand is tainted (in at least some contexts) and people are asking questions…
  • Is SOA really agile when you need to wait months for a new complex feature to be released and 15 components are impacted by it?

  • Does BPM really empower the business when your server goes down and the root cause is not easily discoverable?

  • Is Cloud really a way to lower risk and increase productivity when the elasticity comes with lengthy periods of non-realised benefits, ramp up and confusion?
If this resonates with you, you are at the very least... not alone.
So what is going wrong? Why in some cases, is the buzz seen to be spin, to be vendor marketing; little more than bended truths?
While I obviously don’t know all the answers I’ll take a stab and say it has more to do with maturity levels and insensible decisions then the failings of SOA and its promise.
As novelist Ellen Glasgow once said “All change is not growth, as all movement is not forward.” and with that I hope you’ll allow me to take this opportunity to wax lyrical on Mark Nelson’s gem by way of a few practical tips learnt in the trenches.
Version Control
Don’t just version control your source code. Version control EVERYTHING that will change! This includes:
  • OSB Configuration
  • SOA Projects
  • Customization Files
  • Composite Configuration Plans
  • WebLogic Deployment Plans
  • Build Scripts
  • Test Scripts
  • Deployment Scripts
  • Release Scripts
  • Start-up & Shutdown Scripts
  • “Health Check” Scripts
  • Application Server Configuration
  • Puppet Configuration
  • (Optionally) The Binaries
    Note: This is unnecessary and redundant if you follow good binary management which I’ll discuss in the next blog instalment.
  • And so on….
…But don’t let version control stop at the source code and configuration assets, you should version control all of your documentation as well. For this, I would strongly suggest a wiki. However, there are plenty of expensive EDRMS’ out there too if you prefer to let your documents die a slow and horrible death.
Unit Testing
In the same vein as above, unit test everything! It is a myth that vendor tools don’t cut it when it comes to testing. You just need to know how! And sadly, they don’t always make it easy for you. Here are some suggestions:
  • Use a Web Service client such as soapUI or the OSB console to test for expected output of your synchronous services

  • Use instrumentation to test asynchronous functionality. If you don’t receive a response, don’t worry. You can let your component(s) log at the appropriate steps and your test framework to collate the times/payloads to determine test success or failure. Remember to make the logging pluggable so you don’t impact performance in production!

  • Don’t limit yourself to the happy path; test the unhappy ones as well.

  • Automate ALL unit tests and let Maven kick them off in its lifecycle.  Even tests in soapUI and OSB console can be automated you just need to know how.

  • Google is your friend.
    Are you frustrated with Oracle Business Rules (OBR) because they can’t be easily tested? If so then you better check out Arun’s blog about testing business services (http://beatechnologies.wordpress.com/2012/03/09/automating-business-rules-testing-in-oracle-soa-suite-11g/) as it could be adapted to test OBRs through Maven. Alternatively, there is a Free Tester GUI available at https://code.google.com/p/oracle-business-rules-tester/. Case in point. Even if Google Corporation is not your friend, Internet search most definitely IS your friend.
Acceptance Testing
We can’t migrate from 11g patch set 4 to the latest patch set 7. It would be too expensive”.
If you have heard a similar statement before then you my friend (unfortunately) may be involved in a project with poor quality control. As a big fan of test automation who has worked on many projects with little to no test coverage, it saddens me to still meet people absolutely terrified of change.
Did you know that acceptance tests, integration tests, unit tests can all be automated? Yep.
But Craig, I know they can be automated but it is too technical and expensive.”
As a former believer of such a statement, I have to say I am converted. There are a number of very mature languages out there which allow for acceptance tests to be written in a business language. Here is one such example:
Scenario: Replaced items should be returned to stock
Given that a customer buys a blue garment
And I have two blue garments in stock
And three black garments in stock.
When he returns the garment for a replacement in black,
Then I should have three blue garments in stock
And two black garments in stock

Can you read the above and understand what needs to be manually tested? If you can, then you may be surprised to know that this statement is actually executable and can be used to check whether the product delivers as expected… automatically. If the product doesn’t meet the criteria then it will fail the acceptance test and the whole team will know about it. Yep. This isn’t magic. It is a language called Gherkin and through tools such as Cucumber you can automatically acceptance and regression test your application. What a wonderful world we live in.
Automation as a Project
One of my favourite items in Mark’s blog was the statement that “people often try to automate the build process on a project by project basis.”
This is one of the biggest no nos in my book. When you’re providing all this agility through reusable components why on earth would you want to neglect this valuable discipline in your automation?
Always keep your configuration separate from your implementation via a DSL or Properties file. The moment you hardcode a password or a URL in a shell script which kicks off WLST you are basically saying “Hands off my script!”
In short,
Sharing = Caring
Shell Script + Ant + WLST != "A Good Automation Solution"

As Luke Kanies founder of Puppet put it “
ssh in a for loop is not a solution”.
What’s Next
In future instalments I will reveal more practical tips on:
  • Continuous Delivery
  • Configuration Management
  • Binary Management
  • Dependency Management
  • Virtualization
  • Data Management
  • DevOps
If you liked this post, please subscribe or share it with your network. We love feedback so please don’t hesitate to hit the comments up below!

Thursday, January 10, 2013

How to setup Oracle VM 3.1.1 Demo Env on Oracle VirtualBox


In this post, we will setup OVM Manager 3.1.1 and OVM Server on virtual box.

OVM Manager: ovmm.rubiconred.com 10.0.0.41
OVM Server:     ovmsrv1.rubiconred.com 10.0.0.31

And then we will discover ovm server, storage, create network, vnics, server pool and repository.


1. Install OVM Manager

Create Virtual Machine on virtualbox
Install Linux
Install OVM Manager
Refer to Oracle Document: http://docs.oracle.com/cd/E27300_01/E27308/html/vmiug-manager-installation.html

Regarding the network of virtualbox, you can choose Host-Only or Bridge.

Since in my demo env, OVM Manager virtual machine and OVM Server virtual machine will run on different physical box, so I choose Bridge type.

VirtualBox Configuration:


Or the simplest way is to download VirtualBox Templates for Oracle VM 3.1 from Oracle Website:

2. Install OVM Server

Create Virtual Machine on Virtualbox
Install OVM Server
Refer to Oracle Document: http://docs.oracle.com/cd/E27300_01/E27308/html/vmiug-server-installation.html

VirtualBox Configuration:


Now we have 2 virtual machines, one for OVM Manager and one for OVM server.

It's time to config OVM Demo Platform on Oracle VirtualBox now.
Since it's a demo env, we will keep the configuration as simple as possible. For example: using nfs for repository and server pool heart beat, using same network for management and virtual machine...
Lets start to configure it!!!

3. Discover Oracle VM Servers

Click discover server button, marked with red color


Fill agent password and server ip address, click OK button.


The Oracle VM Servers are discovered and added to the Unassigned Servers folder in the Servers and VMs tab.


4. Discover Storage

In this demo, to keep it simple, we are using NFS storage.
These NFS storage are virtual disks attached to virtual machine of ovm manager 3.1.1

Click Storage Tab and Click Discover File Sever button


Fill Server Name, IP Address and then click Next button


Select Servers and Click Next button


Select File Systems for VM and click Finish button


File Server has been discovered successfully


5. Create Virtual Machine Network
Since we are using NFS-based storage, we only need create a network with Virtual Machine role. this can be assigned to the existing management network or a new network.

To keep it simple in this demo env, we will use existing management network instead of new network to be created.

Edit existing network


Select Virtual Machine and Click Next Button


Select Servers and Click Next button


Select Ports and Click Next Button


Click Next button and then Click Finish button


6. Create VNICs

Under Network Tab, Click Virtual NICs and then Click AutoFill button and Create Button


The created results VNICs are shown in the OVMM console


7. Create Server Pool

Click Create Server Pool Button from Toolbar


Enter Sever Pool information and Click Next to Create Server Pool


Add Servers to the Server Pool and Click Finish Button


Now Server Pool RubiconredServerPool01 is created and ovmsrv1 has been added to the server pool successfully.


8. Create Repository

Under Repositories tab, Click Create New Repository button


Fill the Wizard, select Network File System to create repository


Repository is created properly now.


Now you are able to create new virtual machine in this demo env.
Have fun.


Thursday, November 8, 2012

Open a Workflow Task or Instance Trail from Oracle BAM 11g

An interesting requirement that I have recently seen a lot of clients demanding in their BAM dashboards is the ability to action or monitor process instances. Oracle BAM 11g typically provide means to create real time dashboard for process metrics to business process stakeholders. However a lot of organizations are beginning to prefer to also use it as a starting point to get more insight into instance details (such as in-flight status, flow trail, fault information, etc.). One of my reputing requirement in the past was so much as to provide a mechanism to open actionable task forms directly from BAM. And then sometime back I had the same question asked again as how to open a process instance trail directly from Oracle BAM 11g to view its fault details. This is a natural demand for process owners typically in the support role who are alerted of fault notifications from BAM and would not like to go through the trouble of going back and forth the BAM dashboard and the Enterprise Manager console to correlate instances together. This eventually led me to believe that, it is in fact a sought after requirement and hence this article will aim to provide a detailed and step by step guide to define and implement this use case.

In a nutshell, this article will demonstrate creation of actionable links in a BAM dashboard to view and instance trail of a composite instance and from there dig into its audit trail or flow trace. Another useful feature demonstrated will be the use of Action Buttons in Oracle BAM 11g dashboard to launch instances of human workflow tasks of a BPMN composites awaiting to be actioned from designated process users. When such an instance is clicked the user is taken to the BPM workspace UI and take an action on the selected task.
This allows business users to seamlessly monitor business applications and processes and be able to correlate them with instances appearing across different UI’s of the Oracle SOA Suite 11g product suite such as BPM Workspace and EM Fusion Middleware Control console. It is essentially useful for organizations that intend to use Oracle BAM as an operational dashboard for process users in addition to it being used as a real time business metrics monitoring and alerting dashboard.

Take a Sneak Peak at the Use Case
The following video will show a sneak peak of the use case intended to be demonstrated in the course of this article.

During the course of implementing the use case, the article will also describe the following activities in detail:
  • An Overview of creating and assigning values to a business indicator and publishing it to Oracle BAM data objects at runtime.
  • Configuration changes involved in sending the process metrics data from a BPM process to BAM data objects such as activating sampling points, enabling data targets, configuring the OracleBAMAdapter and altering BPMN engine MBeans .
  • Create Streaming Action Lists in an Oracle BAM reporting view to track in-flight instances of a composite that are assigned to process owners, waiting to be actioned. and a list of completed instances.
  • Create an action list of completed instances and define an action to launch their audit trail in the Enterprise Manager console. This concept is useful as this can be extended/customized to instead create a list of faulted instances for users to gain detailed insight into the fault details from the Enterprise Manager Fusion Middleware Console.
  • Configure External Data Objects and create lookup fields in BAM.
  • Create and configure action buttons in Oracle BAM to open an external URL and pass the value(s) of a column in an action list for a selected instance to the URL term.
To gather process metrics and activity instance data in BAM to be able to build the reports, an existing BPMN based composite will be used. The composite project can be downloaded from the example demonstrated in an earlier BPM post on event based gateways. The article also describes the use case the project tries to address in details.
The download link for the application workspace is provided in the aforementioned article. The soapui project to create sample instances and thus populate the BAM reports is provided at the end of this article.
Prerequisite(s)
The modelling workspace and the version of Oracle BPM and BAM Suite used in this demonstration is 11gR1PS5 i.e 11.1.1.6 although the concepts discussed are generic and applicable to all versions.
Creating the Business Indicator(s)
Import the application workbench consisting of the modelled process in JDeveloper. To begin with the article describes adding a business indicator to capture the credit card approval status as the instance progresses through multiple activities.
In the JDeveloper menu click on View > BPM Project Navigator and open the AccountOpeningProcess business process. You will notice a Structure pane visible in the bottom left hand side of the editor. If the structure pane is missing then click on View > Structure to be able to see it. Expand Business Indicators > Dimension and right click on it to be able to add a new dimension of type String. Name the dimension as cardApplicationStatus. For simplicity this article just has a single business indicator, though in real business processes you may end up having multiple KPI collecting indicators.

image

Once an indicator has been defined, it has to be assigned a certain value to depict a business friendly state of the process instance is currently in. Have a look at the red information rectangles for the AccountOpeningProcess as depicted in the screenshot below. They may well represent the various business friendly stages of the application status. For example, when a New Application request is received  by the process the business indicator may be set to “PPLICATION IN PROGRESS indicating that it is being currently processed upon. If the customer for any reasons wants to terminate his application midway while his initial request is in-flight, the application status may be transitioned to “REQUESTED CANCELLATION”. Similarly there may be other intermediate statuses that can be captured in a long running business processes and be presented to business stakeholders or process owners.

image

Populating a business indicator with a pre-determined value is straightforward. It is in a similar way as a value is assigned to any other process variable. Double click on the New Application start message event and then on the Data Associations link. Simply drag the Expression icon on the cardApplicationStatus metric variable under OnlineAccountOpenin>DataObjects on the right hand side of the Data Association wizard and assign it a static value of “APPLICATION IN PROGRESS”.

image

Similarly, double click the Cancel Application intermediate event and then assign REQUEST FOR CANCELLATION to the same business indicator from the Data Associations link. When the business processes receives an intermediate request for cancellation while the task is still in progress, the cancel application intermediate event is invoked and the latest status of the process instance (determined by the cardApplicationStatus business indicator) is replaced. Use the same technique to assign other possible approval states to the business indicator for other activities.

image

Configuring Sampling Points and Data Targets

Now that the business indicators are assigned appropriate values describing meaningful process states, the next thing is to publish these indicators to BAM. Readers familiar with Oracle SOA Suite will know that sensors can be defined for the BPEL engine to automatically publish their data to BAM data objects in real time as soon as their values in the business process changes. Unfortunately as of now, sensors cannot be defined in Oracle BPM Suite. Instead there is a concept of Sampling points.  The BPMN Service Engine uses the defined sampling point configuration to decide when and where to publish process analytics information. Process analytics sampling points can be created for all activities, just interactive activities or disabled altogether. The process metrics can be published internally to the in-built cube star tables in the SOAINFRA schema or externally to BAM data objects. The process sampling points can be configured by right clicking on the BPM process from the BPM Project Navigator view and then clicking Project Preferences . This article needs sampling points to be generated for all activities in the business process, hence Generate for All activities from the Project Sampling Points radio options is selected. Sampling points capture a host of other information in addition to capturing the values of defined business indicators such as performance and workload metrics. Also note that choosing Generate for All Activities will generate a lot of data to be published to BAM. More information about Process Analytics and Sampling points can be read at the official Oracle documentation site at
By default the sampling point only publishes process metrics to the internal CUBE_* tables in the SOAINFRA schema. To publish these analytics data externally to BAM click on the Data Targets tab and check Enable BAM option. Also change the default Data Object Path to something like /Customer/AccountInitiation. This ensures that all data objects pertaining to a project are created in the folder hierarchy entered in the data object path field.  This external publishing of the BPMN engine data to BAM data objects in the active data cache is taken care by the OracleBAMAdapter. This adapter has two predefined connection factories. It allows either publishing the data to the BAM engine either through a RMI interface or through a web service interface.  The BAM Adapter JNDI name for these interfaces is either eis/bam/rmi or eis/bam/soap respectively. The eis/bam/rmi provides a better performance as this doesn’t employ the BAM web service interface and used preferably if the BAM and BPMN engine reside in the same JVM.

image

Configuring the OracleBAMAdapter

The integration glue that binds and permeates instance metrics information to pass from the BPMN engine to the BAM active data cache is the OracleBAMAdapter. The  BAM adapter needs to have the same JNDI (one that was selected in the previous step) configured that is pointing to the correct instance of the BAM active data server. Oracle Weblogic Server administration server console provides the mechanism to view and edit BAM adapter configuration properties. Login to the administration and navigate to Summary of deployments > OracleBamAdapter > Configuration > Outbound Connection Pools and click on the eis/bam/rmi connection pool to view its default configuration properties. These properties may have to be changed to point to the correct instance of the BAM active data cache server. It is also important to note that any change in these adapter properties are applicable only when they are saved and the adapter configuration is updated. This typically happens when the adapter is either redeployed with the changes in the plan file or updated with  the saved changes.  Proper configuration of all of the above settings is important for the BPMN engine to be able to plug with the BAM server.

image

On an Oracle BPM Suite 11g PS3 and above, with only these changes in place, simply deploying the BPM project will create the necessary data objects in the BAM active data cache. Open the Oracle BAM console and click on the BAM Architect view to be able to see the list of data objects existing in the BAM active data cache server. Notice the AccountInitiation subfolder created under DataObjects > Customer folder. Under this hierarchy will be the data objects containing the instance metrics data published from the BPMN engine. Later parts of this article will show how these data objects will be used to create interactive reporting view in BAM.

image

BPMN Engine MBean configuration Alteration to Allow the engine to post data to BAM

As discussed earlier, the above set of configuration changes are sufficient to create the data objects when the business process composite is deployed to the application server. Now when an instance is created and executed it is expected that these data objects will have process metrics value populated at near real time. However the contents of the data objects are not be populated unless a certain disable action to supress process measurements to be sent to the BAM engine is turned off. Login to Oracle Enterprise Manager Fusion Middleware console and navigate to soa-infra > SOA Administration > BPMN Properties > More BPMN Configuration Properties to view the configurable BPMN engine MBean properties. Scroll down the list to see the DisableActions property. The default value for this property is BAMCommand, which supresses measurement actions to be sent to BAM. Clear this field (leaving it blank) and save the settings. If another instance of the BPMN process is now executed, the BAM data objects will being to be populated with measurements obtained for the  various process activities.

image

Creating the Reporting Dashboard in BAM

With the data objects being able to receive measurement data from the business processes, the next thing to do would be to create the BAM reporting dashboard. The dashboard to be developed in this article will have two horizontal regions each displaying a streaming action list of its own. The idea is to have one of the horizontal view displaying recently completed instances and have a hyperlink defined to launch its detailed audit trail in a pop-up while displaying the list of in-flight instances in another. The view showing the in-flight instances will also provide an action button to launch the approval task form for the the selected instance.  As a desirable feature a similar  streaming list of displaying the faulted instances can also be created that leads process users enlisted as support stakeholders to the flow trail to know the exact point and reason of failure.
Login to the Oracle BAM 11g console and from the landing page click on Active Studio (this is where reports and alerts are create in BAM). Click on the Create a New Report link to open the tiled report template selection screen. Select the template titled Two equal horizontal tiles with thin separator. From the list of various report types in each of the horizontal tiles select Action List and  title the report as Credit Card Approval Scoreboard. Each of the report views will prompt for a data object to be selected from which the view will sources its data content.
The upper horizontal tile is used to display a list of completed instances. For this view select BI_default_OnlineAccountOpening_AccountOpeningProcess as the data object and then click on the Fields tab. This lists all the fields in the data object. From a reporting standpoint, it may not necessarily make sense to display all the fields in the data objects but only a few important ones.  For the report in this article, the selected fields are COMPOSITE_INSTANCE_ID,  BI_NAME, COMPONENT_START_TIME, COMPONENT_END_TIME, COMPONENT_INSTNANCE_STATUS, COMPOSITE_NAME, COMPOSITE_REVISION, DOMAIN_NAME and METRIC_cardApplicationStatus. These fields however will appear in the report in their alphabetical order. To change this check the select-boxes corresponding to these fields and use the Arrange icon to rearrange them to be displayed in a custom order. Optionally the report can also be pre-sorted based on values a particular field by moving the field under the Sorted Fields panel in the Sort tab.

image

Another important thing worth mentioning here that if the view configuration is left just as it, a whole lot of duplicate instances will appear in the list. They are not necessarily duplicate as the process measurement data is published for every activity. Therefore the same composite instance will have as many rows in the data object as the number of activities in the original business process. There will however be only one row with the latest snapshot of the process. In order to show only the unique and non duplicated list of composite instances in the streaming list the Filter tab can be used to and add a filter expression to discard the non-latest snapshot of an instance. Add a new filter entry and for the filter expression select the field as LATEST from the data object fields, the comparison type as is equal to and equate it to a value of Y. For the report in this article, yet another filter is added to display only the approved instances by adding a filter expression to equate the METRIC_cardApplicationStatus field to a value of APPROVED. The list can be narrowed further by adding more filters to the list.

image

The Properties tab allows to change the view name, fonts and other visual aspect of the streaming list.The final streaming list view should resemble something as shown in the below screenshot.

image

Hyperlinking a Column in the Report with an Action

Well, the teaser video above showed that the composite instances in the view were hyperlinked which when clicked pops up the audit trail (as seen from the composite dashboard of Enterprise Manager Fusion Middleware Console) for the selected instance. Now for the creamy part of this article, it will be described to create and implement action buttons in Oracle BAM and how they can be used in a report. Select the Completed Instances streaming list report tile and then click on the Change Report Properties link under the report Actions menu. This opens the Report Properties popup dialog. Click the Actions tab and then the New button to create and configure a new action for the report. Provide a name and optional description for the action name and hit Next.

image

The Action Type lists various action that can be performed on data in a report such as executing a read/write action on data input, selections from that action list or form, open an external URL etc. From the options in the select the Open a URL radio box and then click on Next to open the Action Editor. The action editor provide a very convenient feature to construct a URL by creating a combination of terms term which can be concatenated in the end to form the final URL. These terms can be configured to either have constant values or represent dynamic columnar values from any selected view in a report.

image

Before being able to configure the URL term, it is required to know how to open the link to the audit trail of an instance. The audit trail of any composite instance can be directly viewed in the browser by using the link below.
http://<hostname>:<portName>/em/faces/ai/soa/messageFlow?target=/Farm_<domain_name>/<domain_name>/soa_server1/<partition>/<composite_name>%20[<version>]&type=oracle_soa_composite&soaContext=<partition>/<composite_name>!<version>/<instance_id>
The link, however is made up of a lot of instance specific information such as the host, port and partition of the soa server where the composite is deployed to, its version and the instance id. Interestingly all but the host name, port name and the domain name (Weblogic server domain name) can be figured out from the default data object itself. They can either be hard coded for each instance of the BAM server to have the corresponding value of the SOA server or the other ingenious way is to create a table in the database and read the values from it. The instance specific information can be directly derived as values of the selected row from the view list. There are other ingenious ways to do it if you dont want to hard code these values. Entering constant values for a URL term is pretty simple. Simply choose the Mapping Type as Constant Value to be able to enter the hard coded part of the URL.

image

The dynamic part of the URL value can be added in a two step process. First select the choose Value from a List View radio buttonin the Mapping Type and then select the view from the report skeleton containing the streaming list to populate a drop down of the data object columns used in the list. Select the appropriate column value that is needed in the URL. For instance, the COMPOSITE_NAME, COMPOSITE_REVISION, DOMAIN_NAME (this is the partition contrary to the Weblogic domain name) and COMPOSITE_INSTANCE_ID may be required as dynamic values in the URL. There is no restriction on the number of terms that can be created as a combination of constant and lookup values to form the complete URL.

image

The final Open a URL configuration screen will contain multiple entries that are a combination of constant hard coded values and dynamic values from the list. These are concatenated together to form the actual URL for the hyperlink to be launched when the composite instance column is clicked in the list view. The wizard also allows editing the features of the popup. Click on the Click here to edit Windows features link and choose Full screen for both the width and height of the popup window to display it in full screen mode.

image

Now that the action is defined the last remaining bit is to configure the action button itself. Click on Next to be presented to the Button Formatting screen. Select the Display the button in a view radio button and from the visual empty report  skeleton select the streaming list view to which the URL action needs to be added. As a hyperlink is desired on the composite instance id column for the view check the Display as a column of formatted links in the selected view option and from the Column to format dropdown choose COMPOSITE_INSTANCE_ID. Click OK on all the screens to save the changed report properties.  With this the configuration changes required for the Completed Instances view of the reporting dashboard is complete. The article will shortly demonstrate how the final view looks like and what does the configured action list do.

image

Adding the SOAINFRA Schema as an External Data Source

In the following part of the article, another interesting aspect of the use case that is to view the task form of an instance that is awaiting an action from a process user will be demonstrated. But before going ahead with creating the report view there is something else that has to be taken care of. In order to open a task form corresponding to a particular instance id, its taskId is required. Unfortunately the default business indicator metrics data object does not contain the task id. The easiest way to lookup taskId for a composite instance is to query the WFTASK table in the SOAINFRA schema.
select taskid,state from wftask where compositeinstanceid=?;
However the problem is that composite instance id and taskId share a one to many relationship. The query to retrieve taskdId from compositeInstanceId my return more than one row and not all of them can be used to open the task form. Another important thing to know would be that only the taskId row that has the value of the state column as ASSIGNED indicates the current task(s) that are pending actioning from process users. This is achieved by simply appending a filter on the state column.
select taskid,instanceid,ecid from wftask where compositeinstanceid=? and state=’ASSIGNED’;
It is therefore required that there is some sort of mechanism available in BAM to lookup these required field from the database table. This is facilitated in Oracle BAM using external data sources. To begin with open the BAM Architect view from the landing page and click on External Data Sources. Click Create to configure an external data source, provide a suitable name, say SOA_INFRA and connect to the [PREFIX]_SOAINFRA schema. Check out the screenshot below to see as how to provide the schema name, password and the connection string. Verify that the connection to the schema is established by clicking the Test button at the bottom.

image

Creating an External Data Object with the WFTASK table

The external data source can now be used to create an external data object. Browse to the AccountInititation subfolder and click on the Create Data Object link to create a new data object. Name it as TaskDetails. Check the option box beside External Data Object  indicating that this data object sources its content from a database table instead. Select the external data source that was created in the previous step and then select WFTASK from the dropdown under External Table Name. The columns of this database table are now available to be added as fields for the data object by clicking on the Add a field link. The fields that are added from database table are COMPOSITEINSTANCEID,TASKID,PROCESSDUEDATE,ACCQUIREDBY,ASSIGNEES,ASSIGNEEUSERS,CREATOR,STATE,INSTANCEID,ECID. Note that only a few of these fields will be needed to configure the report view. After the fields are added click on Save Changes to save the data object. View the Contents tab of this data object to see the selected columns for all the rows in the database.

image

Adding Lookup Fields in the Business Indicator Data Object from the External Data Object

As discussed earlier the streaming action list view to display the in-flight composite instances with human tasks will need to source its reporting data from the BI_default_OnlineAccountOpening_AccountOpeningProcess data object. But somehow this data object would need the additionally  required fields too such as the TASKID, STATE. These fields can be looked up from the TaskDetails data object. This is straight forward as Oracle BAM data objects allows creating look up fields that can be created to look up data from different data objects. Open the BI_default_OnlineAccountOpening_AccountOpeningProcess data object and click on Layout > Edit Layout to be able to add lookup fields to it. Once in the edit mode, click on the Add one or more lookup fields link at the bottom to open the lookup field definition popup. Select the TaskDetails data object and from the list of Lookup Fields click on the TASKID field. This lookup however will be based on some common fields in both these data objects. Select COMPOSITEINSTANCEID from the list under Fields to match from Lookup Data Object  and COMPOSITE_INSTANCE_ID from the list under Fields to match from this Data Object. Click Add to define the lookup criterion. More than one such lookup criterions can be added if needed be. Similarly add another lookup field i.e the STATE from the TaskDetails data object. Keep the lookup criterions based on the COMPOSITE_INSTANCE_ID and COMPONENT_INSTANCE_ID. Now the  BI_default_OnlineAccountOpening_AccountOpeningProcess will also have the values for TASKID and STATE for a given composite instance.

image

Configuring the Streaming Action List for Inflight Instances
Make sure everything is saved for the moment. Edit the  original report template and for the next horizontal tile too select the view type as Action List. The streaming list view will have to be now configured to show the relevant in-flight live instances. Open the report in the Edit mode. For the data object field select the same data object as used in the previous view i.e BI_default_OnlineAccountOpening_AccountOpeningProcess. Go to the Fields tab to select and arrange the following fields in their order: COMPOSITE_INSTANCE_ID, BI_NAME, COMPONENT_NAME, METRIC_cardApplicationStatus, STATE, TASKID. From the Sort tab add BI_NAME and METRIC_cardApplicationStatus under the Sorted Fields.

image

As stated earlier if no filters are applied to this data object list, it will end up displaying all the instances against all executed activities in the business process. In order to view non-duplicated composite instances only the ones that are latest are to be filtered out. and just those that are assigned to process users. Having such filters is easy. Click on the Filter tab and click on Add Entry. This opens the Filter Expression wizard. Add a filter for the STATE field having a value of ASSIGNED. Similarly add another filter for the LATEST field to have a value of Y. This would do the work.

image

The display settings of a report are configured from the menu tabs under for the Properties button. Click on the Properties button and under the General tab enter Live Instances for the View Title. By default the streaming action list shows checkboxes against all the rows in the report. Change these to radio buttons so that only an instance is selected at a time. Go to the Actions tab and select Single Select (radio buttons) options.

image

Once these settings are applied and saved the streaming list will show the in-flight instances along with their task identifier and the pending action. Optionally, the task creators, assignees, task expiration time, priorities etc. can also be shown in this list to have a better visibility as to which tasks are assigned to which process and which tasks needs urgent attention. Also note that the column titles displayed in the screenshot below is different from the data objects fields. This can be done by overriding their default names from the Text and Align tab under the Properties button.

image

Define an Action Button for the selected instances of the List
The final piece in the hook is to define an action button for a selected row in the report view. What is desired here is that when a row is selected the action button should take the users to the approval form for the selected instance. This would effectively mean launching the business process workspace view of the task form allowing it to be actioned if needed be. Opening the task approval form is easy. The URL to be used to launch the task form simply needs the HOST and PORT on which the business process workspace is running and the task id of the composite instance (which is obtained already and displayed in the list).
http://HOST:PORT/integration/worklistapp/faces/home.jspx?taskId=TASKID
The same set of steps that were discussed earlier to create an action button can be executed once again to create another action button. Open the report once again in the Edit mode, select the view and click on Change Report Properties.  Click on the Actions tab and then the New button to open a new action editor wizard. Name this action button as View Approval Page. In the next screen define the type of action as Open a URL. The URL for the action button can be configured by adding constant or dynamic strings (here referred to as Terms) which when concatenated will give the complete URL string.

image
Create a New Term with constant value by passing the entire URL string except the TASKID in it. Be sure to replace the value of the HOST and PORT with that of the server instance running the business process workspace user interface. Add another New Term but this time choose Value from a List View from the mapping type action list. The next screen displays the report skeleton from where select the live instances view in the report. This will show all the selected data object fields configured for the list as dropdowns under Select a column from this view column. Select TASKID and then click OK. 

image
In the following Button Formatting screen simply select the Display the button in a view radio button under the Button Location panel. This will add the action button in the same view. For rest of the screens simply click on OK to save the report property changes.

image

Appreciating the End Result
Well, that’s it! After all these changes your BAM users will be able to see two streaming lists of completed/historical instances and in-flight instances. The users will also be able to view the instance audit trail by clicking on an instance in the list and if they happen to be process users then also action in-flight instances by selecting it and clicking the View Approval Page action button. This also allows you to create a seamlessly correlated view of instances across the multiple dashboards that Oracle SOA Suite 11g has to offer. It is important to note that not everyone in the organization will be able to view the task-form for the instance. Only users who are assigned to the process roles to action the task will be able to do so. This ensures that the security aspects of this implementation methodology is also covered
image
Downloadable Resources for the Project
You can import these data objects and reports into your BAM server by running the ICommand utility. The easiest way is to copy all the dataobjects and reports in the DataObjects.zip file to the <MIDDLEAWARE_HOME>\Oracle_SOA1\bam\bin directory and then run  icommand –cmdfile import.xml in the command line. Before running the Icommand utility make sure that the BAMIcommandConfig.xml file under the <MIDDLEAWARE_HOME>\Oracle_SOA1\bam\config directory is configured to point to the correct instance of the BAM server. A detailed explanation of working with the ICommand utility can be read here at http://docs.oracle.com/cd/E14571_01/integration.1111/e10224/bam_app_icommand.htm
Feel free to post comments and suggestions, and possible improvements and I will be glad to incorporate them here. If you have a similar requirement and are struggling to re-create a reporting dashboard similar to what is proposed, send us a message.